As of 2024, Docker for Modern Developers has revolutionized the software development and deployment landscape, with over 13 million developers and over 10 billion container downloads from Docker Hub. Containerization technology, powered by Docker, is now used by over 60% of companies globally to streamline software delivery pipelines, enhance scalability, and increase development efficiency. In fact, 82% of enterprises using Docker report faster deployments and a significant reduction in the “works on my machine” problem that plagues traditional development workflows.
As Docker continues to evolve, its ability to simplify deployment, promote consistent environments, and improve collaboration across teams has made it an indispensable tool for modern developers embracing DevOps practices and cloud-native architectures.
Table of Contents
What is Docker?
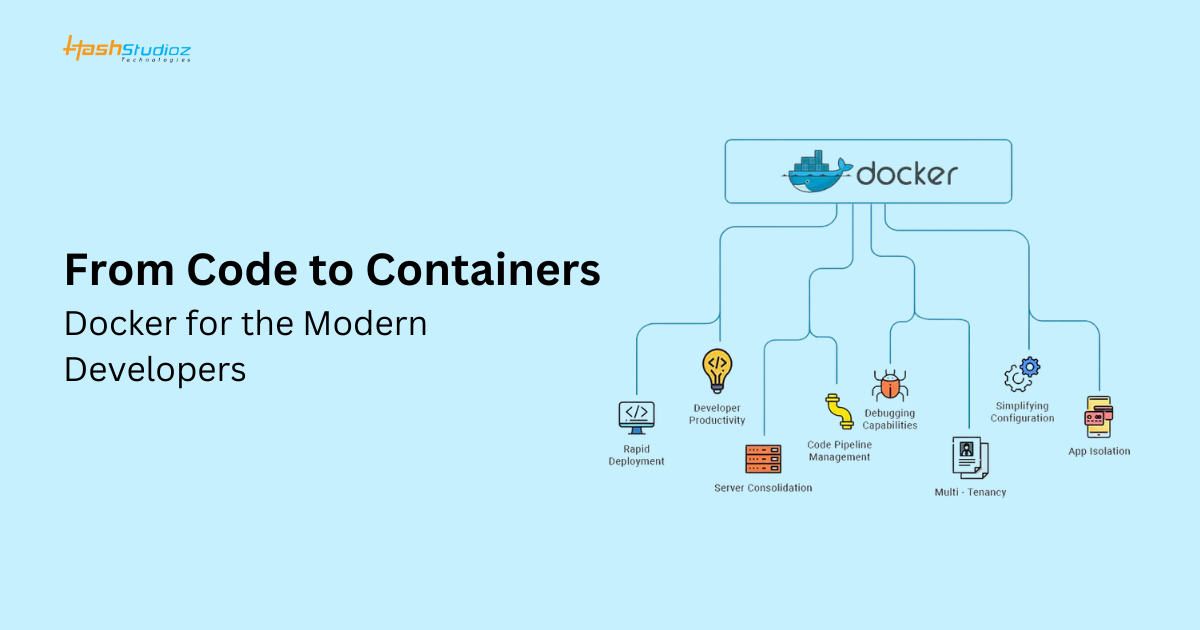
Docker is a tool that lets developers package applications with everything they need to run, so they work the same in any environment. This makes it easier to build, test, and deploy apps quickly and reliably.
Problem Statement
In software development, applications often behave differently across environments due to variations in configurations, libraries, and system dependencies. This inconsistency can lead to unexpected bugs, deployment delays, and increased maintenance. Traditional deployment methods are time-consuming and require significant manual setup to replicate environments accurately, making scaling and collaboration difficult.
Docker addresses this problem by allowing developers to package applications and their dependencies into standardized containers that run the same on any system, reducing these issues and streamlining the deployment process.
Docker Consists of three Main Components: Containers, Images, and Volumes.
In simple terms, you can think of a computer as a container, the software running on it as an image, and the storage for data as a volume and all these resources are taken from your computer (The host machine).
Each container can run the same image, but they operate independently with isolated data.
Images can be found on Docker Hub. For private images, you must log in to access them. However, for public images, such as Alpine, PostgreSQL, and Nginx, logging in is not required.
To pull images, you can use the command docker pull postgres. If no tag is specified, Docker will pull the default latest tag. If the latest version is not available, you need to specify the tag explicitly, like this: docker pull postgres:3.2.
Note: Every Docker image includes an operating system. If you want to create your own Docker image starting from Ubuntu or Alpine, you can use docker pull ubuntu. You can then install Node.js inside that container. However, if you pull the Node.js image directly using docker pull node, it will already include a base operating system (say Ubuntu).
Now lets run it again and see what happens ->
Yes, it’s much faster now! In conclusion, if the image is not available locally, Docker will automatically pull it from Docker Hub online.
Command:
docker image ls
Let’s explore the visual elements in Docker Desktop.
Similarly, docker ps
Now, let’s run the images.
Sometimes, when you pull and run an image using docker run <image_name>, it executes successfully. For example, docker run alpine will run without issues because it doesn’t require any environment variables. However, if you simply run docker run postgres, it will produce an error due to missing necessary environment variables.
Yes, we need to specify some environment variables when running the PostgreSQL image. The command would look like this:
docker run --name my-postgres -e POSTGRES_PASSWORD=mysecretpassword -d postgres1. --name allows you to give the container a specific name; if you don't provide one, Docker will assign a random name each time.
2. -e is used to set environment variables.
3. -d runs the container in detached mode, allowing you to continue using your terminal after starting PostgreSQL.If you want to expose the container on a specific port, you can use the -p option. If you don’t specify a port (exposing port means you can access from you local machine)
host_port:container_port. For example:
docker run --name my-postgres -p 5432:5432 -e
POSTGRES_PASSWORD=mysecretpassword -d postgres
This command maps port 5432 on your host to port 5432 on the container.
You can stop a container using the command:
docker stop <container_name>
You can specify either the container name or its ID.
Note: The docker run command will first check your local system for the specified image. If the image is not present, it will pull the image from Docker Hub before running it. Essentially, this command combines the functionality of both pulling and running the image.
Here are some additional useful commands:
- docker container ls: Displays all running containers.
- docker container ls -a: Shows all containers, including those that are not currently running.
- docker container prune: Removes all stopped containers.
- docker logs <container_name> or docker logs <container_id>: Useful for viewing the logs of a specific container.
- docker start <container_name>: Starts the specified container.
- docker run -it <image_name>: Runs a container in interactive mode (using the -it option), allowing you to interact with it as if you were inside a new computer with its own OS, storage, and resources taken from the main computer.
- docker exec -it <container_name> bash: Starts a new Bash session inside the specified container.
Note: There is a key difference between run and exec: run always starts a new container, while exec uses an existing container.
Also Read:- How to Reduce No-Shows and Boost Revenue with Amadeus APIs for Better Customer Engagement
Dockerization
Let’s dockerize a Node.js project and upload it to Docker Hub.
Step 1:
Create a simple Node.js application by running npm init -y and paste the JavaScript code into a file named index.js.
const express = require('express')
const bodyParser = require('body-parser')
const app = express()
const port = 3000

app.use(bodyParser.json())
app.use(
 bodyParser.urlencoded({
   extended: true,
 })
)

app.get('/', (request, response) => {
   response.json({ info: 'Node.js, Express' })
 })

app.listen(port, () => {
   console.log(`App running on port ${port}.`)
})
Step 2:
Run the application using the command node index.js, then open your browser and navigate to http://localhost:3000 to verify that the response is correct.
{"info":"Node.js, Express"}Step 3:
Remove the node_modules folder.
Step 4:
Create a file named Dockerfile and write the necessary commands inside it (consider installing the VS Code extension for better suggestions).
Let’s decode it:
- FROM node:slim: This specifies the base image for our application, pulling a lightweight version of Node.js from Docker Hub.
- WORKDIR /app: This sets the working directory within the container to /app.
- COPY . /app: This copies all the files from the current directory (denoted by .) into the /app directory inside the container.
- RUN npm install: This command installs the Node.js dependencies, generating the node_modules folder.
- EXPOSE 3000: This informs Docker that the container will expose port 3000, allowing access to that port from our host system.
- CMD node index.js: This specifies the command to run the application, starting the server by executing node index.js.
Note: RUN is used to execute commands at build time to create an image layer, while CMD specifies the default command that runs when the container starts.
Now that we have converted the project into an image.
Step 5:
Run the command:
docker build -t mano3869/hey-nodejs:0.0.1.RELEASE .Let’s decode it:
- -t: This is the tag option, which allows you to define the name of the image. It must be globally unique on Docker Hub, which is why I used my Docker Hub username followed by 0.0.1.RELEASE to specify the version.
- Make sure you have a Docker Hub account (you can visit Docker Hub to create one).
The . (dot) at the end indicates that the Dockerfile is located in the current directory. If your Dockerfile is in a different location, you will need to specify the appropriate path instead.
And the result will be
You can check the image in Docker Desktop or by using the following command:
docker images ls
Step 6:
Run the image with the following command:
docker container run -d -p 3001:3000 mano3869/hey-nodejs:0.0.1.RELEASEHere, 3001 is the host port, and 3000 is the container port.
Step 7:
Open your browser and navigate to http://localhost:3001. You should see the same result as before.
Step 8:
To push the image to Docker Hub, run the following command:
docker push mano3869/hey-nodejs:0.0.1.RELEASE
Step 9:
Check your Docker Hub profile to verify that the image has been successfully pushed. You can do this by visiting your Docker Hub account at Docker Hub and navigating to your repositories. There, you should see the hey-nodejs image listed with the specified version.
However, this is just the beginning. Suppose this project requires databases like PostgreSQL and Redis, which need to be connected as well. In that case, we need to configure these services, and that’s where a Docker Compose file comes into play.
Docker Compose
Add the following code to your docker-compose.yml file:
Let’s Decode it
- version: This specifies the version of the Docker Compose file format that we can define.
- services: This section represents a collection of images that will run within the same network.
- The other configurations reflect the concepts we’ve discussed previously.
To start all the services defined in your docker-compose.yml file, use the command:
docker compose up -d
Make sure you are in the current directory where the docker-compose.yml file is located before running this command.
You can verify the same in docker desktop also.
The command docker compose down will remove all the containers defined in your Docker Compose file.
Now, to summarize what we’ve covered so far:
You have learned that containers act like individual computers that are derived from your main computer, while images represent the software that runs inside those containers, which can be based on any operating system.
Don’t you have any questions like:-
- How do containers access the internet?
- How do containers communicate with each other or with your host machine?
- Where is the data stored, and can we transfer data from a container to the host machine?
Let’s answer these questions by exploring networking and volume mounting.
Networking
Docker offers six types of networking: bridge, host, none, overlay, ipvlan, and macvlan. Here, we will focus on three of them: bridge, host, and none.
Bridge Networking
The bridge is the default network driver in Docker, which means that whenever you run a Docker image without specifying a network, it will use bridge networking. This type of network creates a bridge between the container and the host machine, allowing containers on the same bridge network to communicate with each other using their IP addresses or container names.
By default, containers on a bridge network are not accessible from outside the host machine unless port mapping is configured. To make services available to the host or external networks, you need to expose ports on the container.
In the command:
docker container run -d -p 3001:3000 mano3869/hey-nodejs:0.0.1.RELEASEThe default network is bridge, which is why we need to expose the port. Without port exposure, you cannot connect to the container from your local or host machine.
Additionally, if you ping google.com from within the container, it will succeed because the container has internet access through the bridge network.
Host Networking
Host networking in Docker is a network mode that enables a container to share the host machine’s network stack directly. This means the container does not have its own IP address; instead, it uses the host’s IP address. Unlike the default bridge network, host networking grants the container access to all network interfaces and configurations of the host.
Since the container uses the host’s network stack, you don’t need to expose any ports. You can run a container with host networking using the following command:
docker container run -d --network=host
mano3869/hey-nodejs:0.0.1.RELEASE
If you ping google.com from within the container, it will succeed because it is directly using the host’s internet connection.
None Networking
The none network mode in Docker means that the container does not have any network connectivity. This configuration prevents communication with other containers and does not provide internet access.
You can run a container with none networking using the following command:
docker container run -d --network=none
mano3869/hey-nodejs:0.0.1.RELEASE
Note
You can create your own network, and containers running within the same network can communicate with each other. For example, to create a bridge network named mynetwork, you can use the command:
docker network create -d bridge mynetworkAfter creating the network, you can run different containers using this bridge mode network:
docker container run -it --network=mynetwork --name abc ubuntudocker container run -it --network=mynetwork --name def busybox
Volume Mounting
You may notice the volume option in Docker Desktop. Volumes are a feature that allows you to store and manage persistent data used by Docker containers.
Typically, any data created or modified within a container would be lost if the container is removed. However, volumes provide data persistence by enabling you to store data on the host machine, separate from the container’s filesystem.
What is Volume Mounting?
Volume mounting in Docker refers to the process of attaching storage from the host system to a Docker container, allowing data to persist beyond the container’s lifecycle. By mounting a volume, you create a shared location for files and directories that both the container and the host can access. This is particularly useful for maintaining data consistency across multiple containers or retaining data even after containers are stopped or deleted.
You can use the following command to mount a volume when running a Docker container:
docker run -it -v host_directory_path:container_directory_path image_nameWith this setup, whenever you create or update any file in the specified container path, it will automatically be copied to the corresponding path on your host machine. This allows you to share data between the container and the local machine effectively.
HashStudioz Solutions for Scalable and Efficient Software Deployment
HashStudioz is a leading software development company specializing in custom solutions, cloud-native applications, and digital transformations. We focus on delivering scalable, efficient, and innovative technology to businesses across industries.
Our Dockerization & Containerization Services help businesses modernize their applications by converting them into portable, consistent containers. We ensure seamless deployment, faster development cycles, and scalable cloud-native architectures, empowering you to optimize workflows and enhance infrastructure with Docker.
1. Containerization & Dockerization Services
- Application Containerization: Help clients convert their traditional applications into Docker containers, ensuring they run consistently across all environments (development, staging, production).
- Dockerizing Legacy Applications: For clients with legacy systems, you can assist in containerizing older applications to modernize them, making them portable, scalable, and easier to deploy across different platforms.
- Custom Docker Image Creation: Build custom Docker images tailored to clients’ specific application requirements, such as creating images with the necessary software stack (e.g., Node.js, Python, PostgreSQL) and configurations.
2. CI/CD Pipeline Integration
- Docker in CI/CD Automation: Set up automated Continuous Integration and Continuous Deployment (CI/CD) pipelines using Docker, ensuring quick and efficient application deployment. This helps clients to deploy their applications seamlessly, avoiding manual errors and delays.
- Docker-Enabled DevOps Services: Implement DevOps best practices using Docker, allowing clients to streamline their software development, testing, and production cycles with faster release times and higher reliability.
3. Cloud-Native Application Development
- Microservices Architecture Implementation: Help clients break their monolithic applications into smaller, more manageable microservices that run in Docker containers. This makes it easier to scale, update, and manage applications independently.
- Cloud Deployment & Orchestration: Use Docker in conjunction with cloud platforms like AWS, Azure, or Google Cloud to help clients deploy containerized applications in the cloud. You can also use container orchestration tools like Kubernetes to manage large-scale container deployments, ensuring high availability and scalability.
Conclusion
Docker has become a game-changer in the world of software development, addressing the age-old challenges of environment inconsistencies, scaling issues, and complicated deployments. By allowing developers to package applications and their dependencies into isolated containers, Docker ensures that applications run the same way across different environments—whether in development, testing, or production. This consistent environment reduces the likelihood of bugs that arise due to discrepancies between environments and accelerates the development cycle.
Docker’s simplicity and flexibility in managing containers have led to widespread adoption in diverse industries, from startups to large enterprises. It allows for easy image creation, container orchestration with Docker Compose, and seamless integration with CI/CD pipelines, empowering teams to build, test, and deploy applications quickly and reliably. Furthermore, Docker’s networking capabilities and volume mounting allow containers to access the internet, communicate with each other, and persist data across container lifecycles, making it a powerful tool for scalable, multi-service architectures.
Ultimately, Docker’s ability to abstract the underlying complexities of deployment and infrastructure management has transformed the way developers work. With its growing ecosystem, Docker has paved the way for microservices, cloud-native applications, and agile software development practices, making it an essential technology in today’s fast-paced software development landscape.